150+ Power Automate Interview Questions and Answers
Welcome to the ultimate resource for Power Automate interview questions and answers. Our goal is to create a library of **150+ carefully curated questions** that cover everything from Power Automate basics to advanced and expert-level scenarios. This page is constantly updated with fresh and relevant interview questions asked in real interviews. Whether you are just starting out or aiming for senior roles, you’ll find step-by-step answers, practical examples, and up-to-date explanations to help you succeed in your Power Automate interview preparation. Bookmark this page and revisit often to access the latest updates.
For deeper technical insights, you can also explore the official Microsoft Power Automate documentation to strengthen your understanding of core concepts. Bookmark this page and revisit often to access the latest updates.

Table of contents
Basic Power Automate Interview Questions
-
1. How would you describe Power Automate in simple words?An Essential Interview Question
-
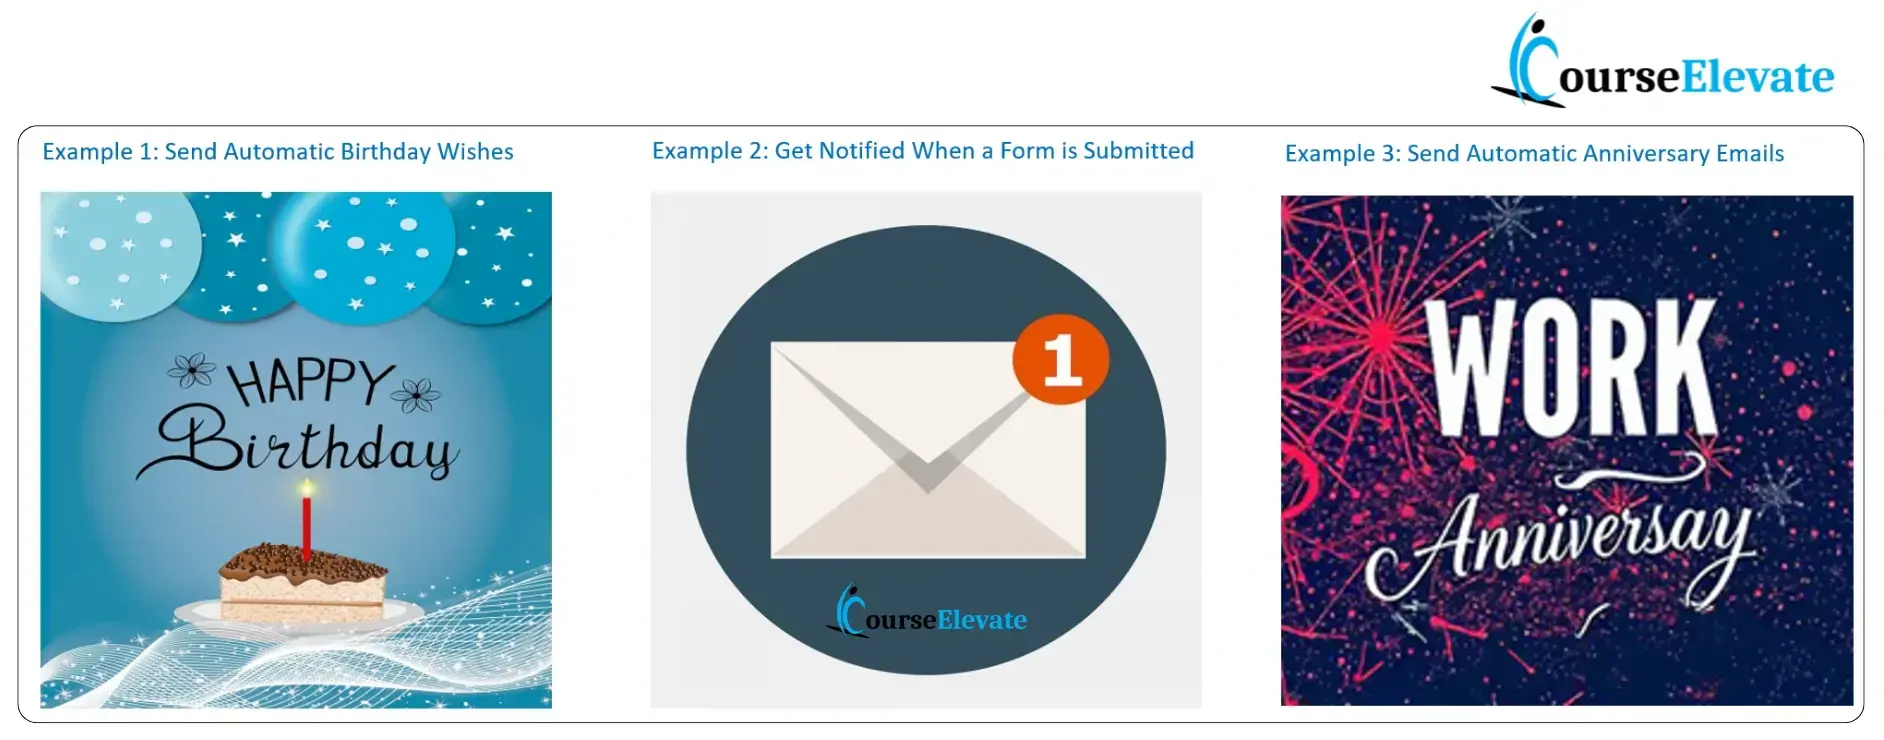
2. Can you give an example of a simple flow?
-
3. What are the triggers in Power Automate?
-
4. What are actions in Power Automate??
-
5. Can you share one example that combines trigger and action?
-
6. How does Power Automate connect to different apps?
-
7. What types of flows are available in Power Automate?
-
8. How can you loop through a list of items in Power Automate?
-
9. What are connectors in Power Automate?
-
10. What’s the difference between a standard and premium connector?
-
11. How does Power Automate differ from Power Apps?
Intermediate Power Automate Interview Questions
-
1. Describe a situation where you would use a ‘Do Until’ loop instead of a simple loop in Power Automate. ?
-
2. How do you share a flow with someone else??
-
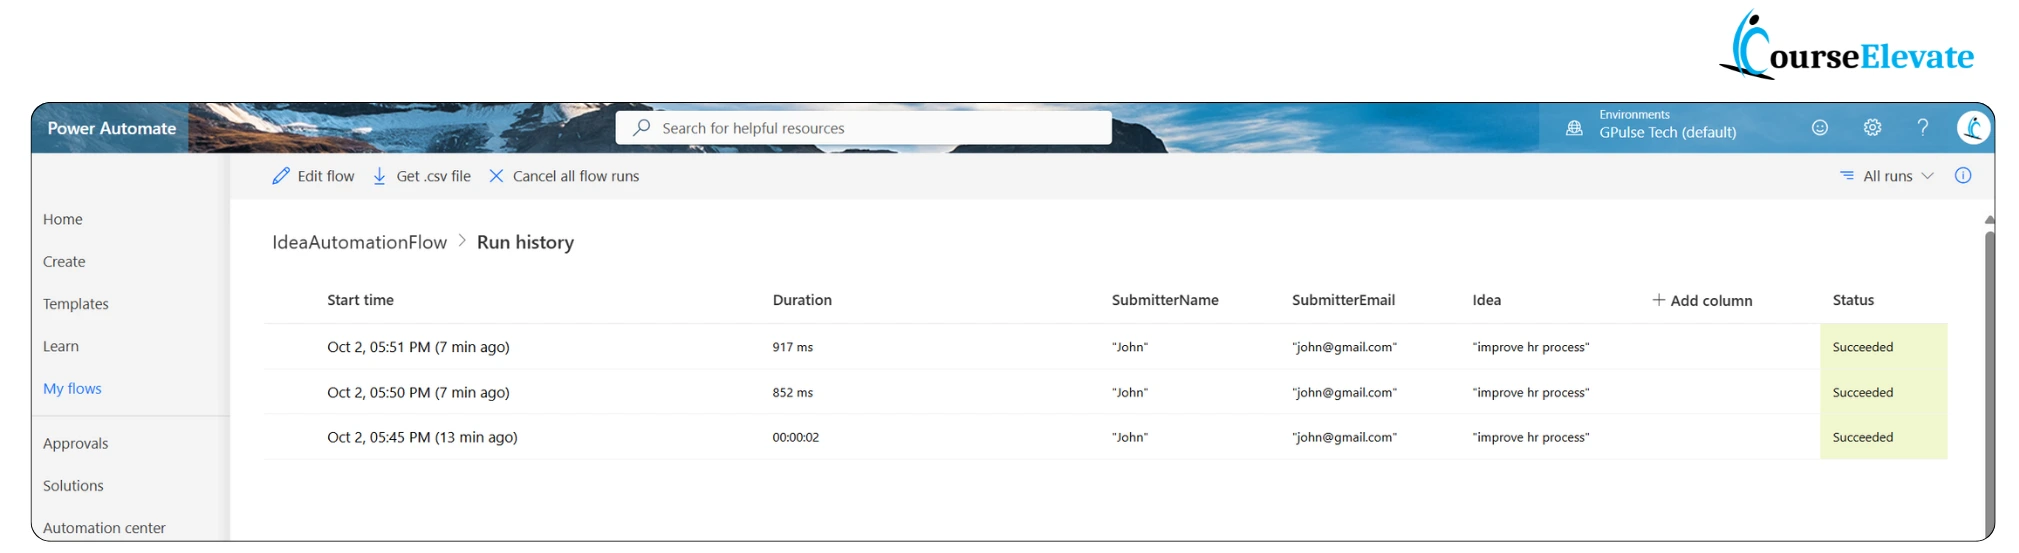
3.How do you monitor your Power Automate flow?
-
4. If a flow fails, how do you figure out the reason?
-
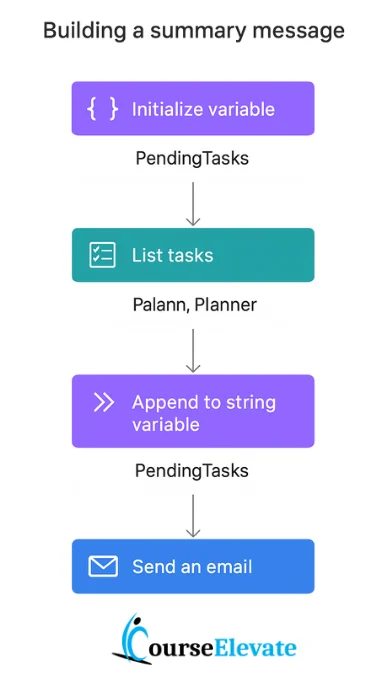
5. Can you explain how variables work in Power Automate?
-
6. How do you use the Terminate action and Configure Run After?
-
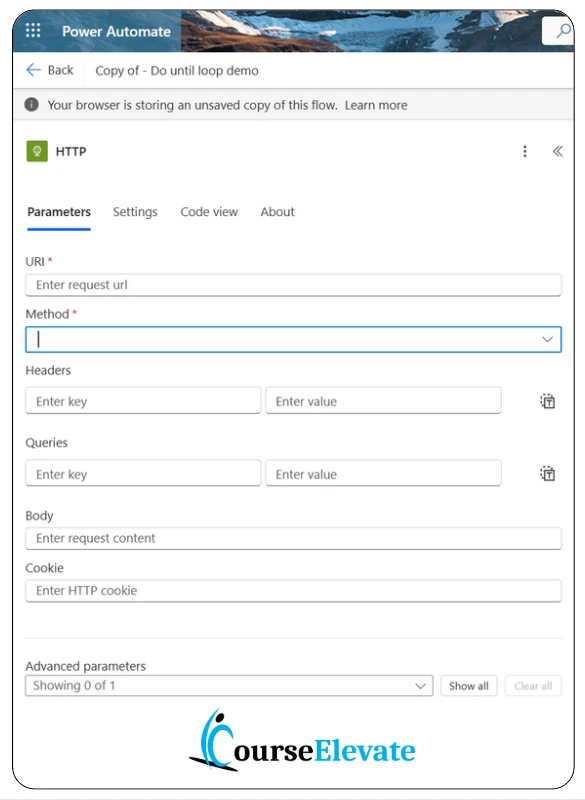
7. How do you use the HTTP action to make REST API calls?
-
8. What is the role of concurrency control in loops?
-
9. How do you manage flow versions and deployments across environments?
-
10. What is the difference between Compose and Initialize Variable?
-
11. How do you use the Filter Array action effectively?
-
12. How do you handle null or empty values in a flow?
-
13. How do you structure a flow for readability and maintainability?
Advance Power Automate Interview Questions
Power Automate Real-World Interview Scenarios
Updated Oct 26, 2025 — Latest improvements added to the Power Automate interview question set.
Check back soon for more real interview questions and answers.