
Introduction
Role-based security is essential for building scalable and secure enterprise applications. In Power Apps, integrating with Azure Active Directory (Azure AD) allows you to control access dynamically based on user roles. This article walks you through implementing role-based security in Power Apps using Azure AD groups, leveraging the Office 365 Groups connector.
Why Use Azure AD Groups for Role-Based Security?
Azure AD groups offer centralized user management and work smoothly with Microsoft 365 tools. Benefits include:
- Scalability: Easily control who can access multiple apps.
- Security: Apply the same access rules everywhere.
- Flexibility: Change user roles without touching the app’s code.
Prerequisites
Before you begin, ensure you have:
- Access to Microsoft Entra Admin Center (formerly Azure AD)
- A Canvas App built in Power Apps
- The Office 365 Groups connector added to your app
Step 1: Get the Azure AD Group ID
To retrieve the Group ID (Object ID):
- Go to Microsoft Entra Admin Center
- Navigate to Azure Active Directory > All Groups as shown below.
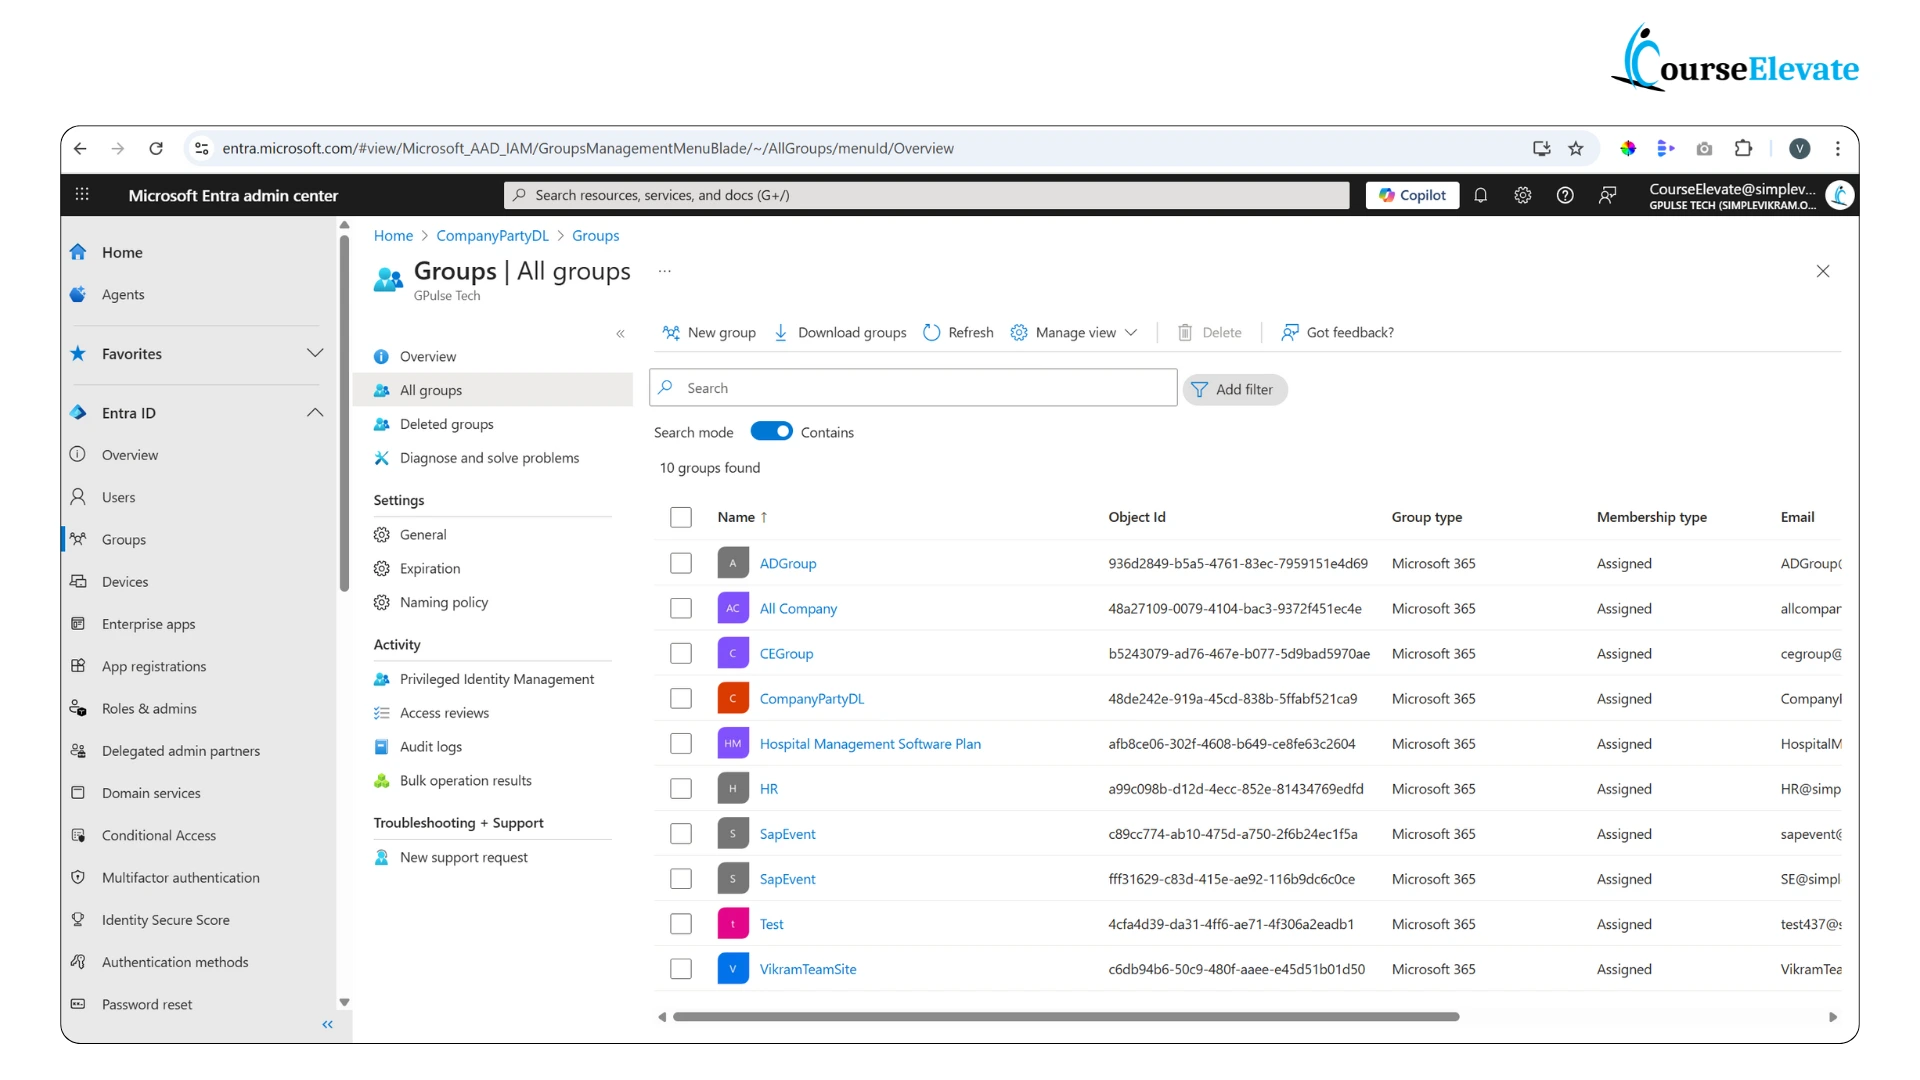
- Select your target group
- Copy the Object ID — this is your Group ID
Step 2: Add the Office 365 Groups Connector
In Power Apps:
- Go to View > Data sources
- Search for Office 365 Groups
- Add it to your app
Step 3: Retrieve Group Members
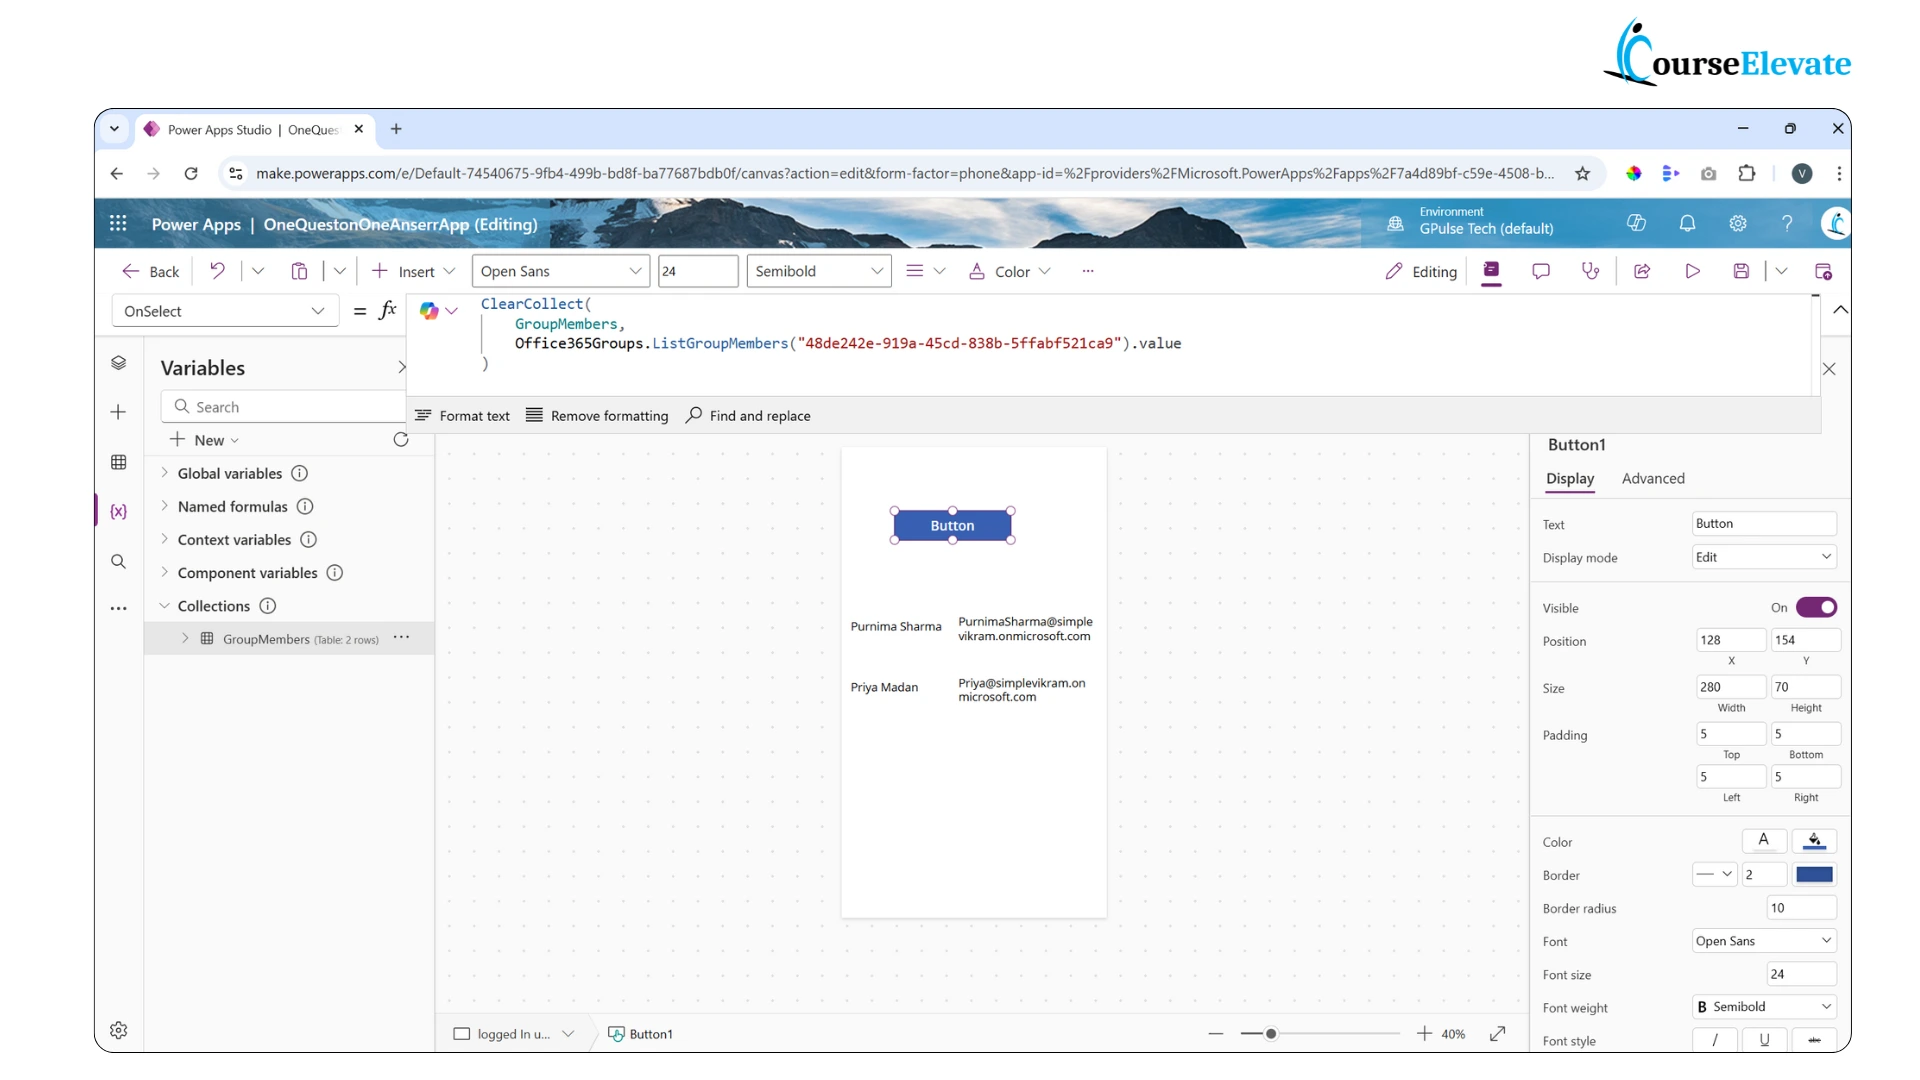
Use the following formula to collect group members:
ClearCollect(GroupMembers, Office365Groups.ListGroupMembers("YourGroupID").value)
Replace “YourGroupID” with the actual Object ID of your Azure AD group as shwon below.
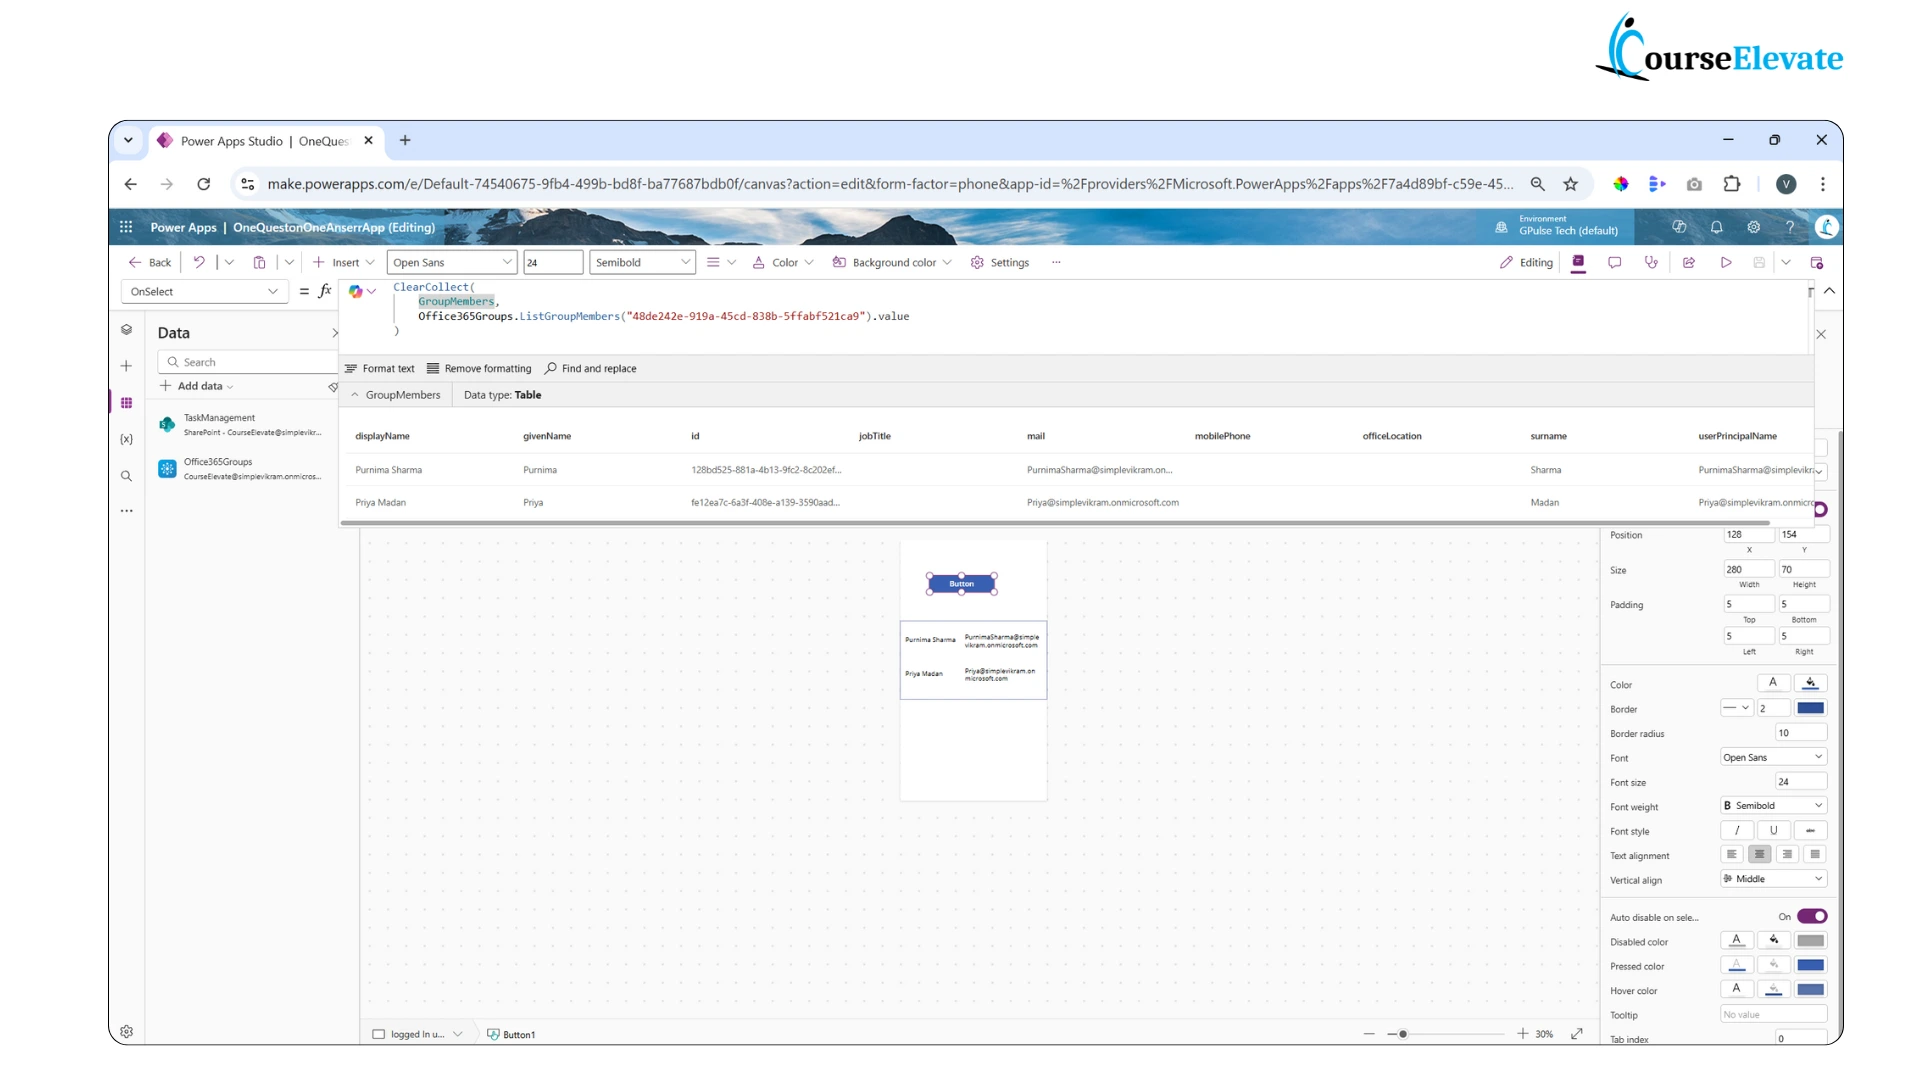
This GroupMembers collection will contain user details such as displayName, userPrincipalName, mail and id as shown below.
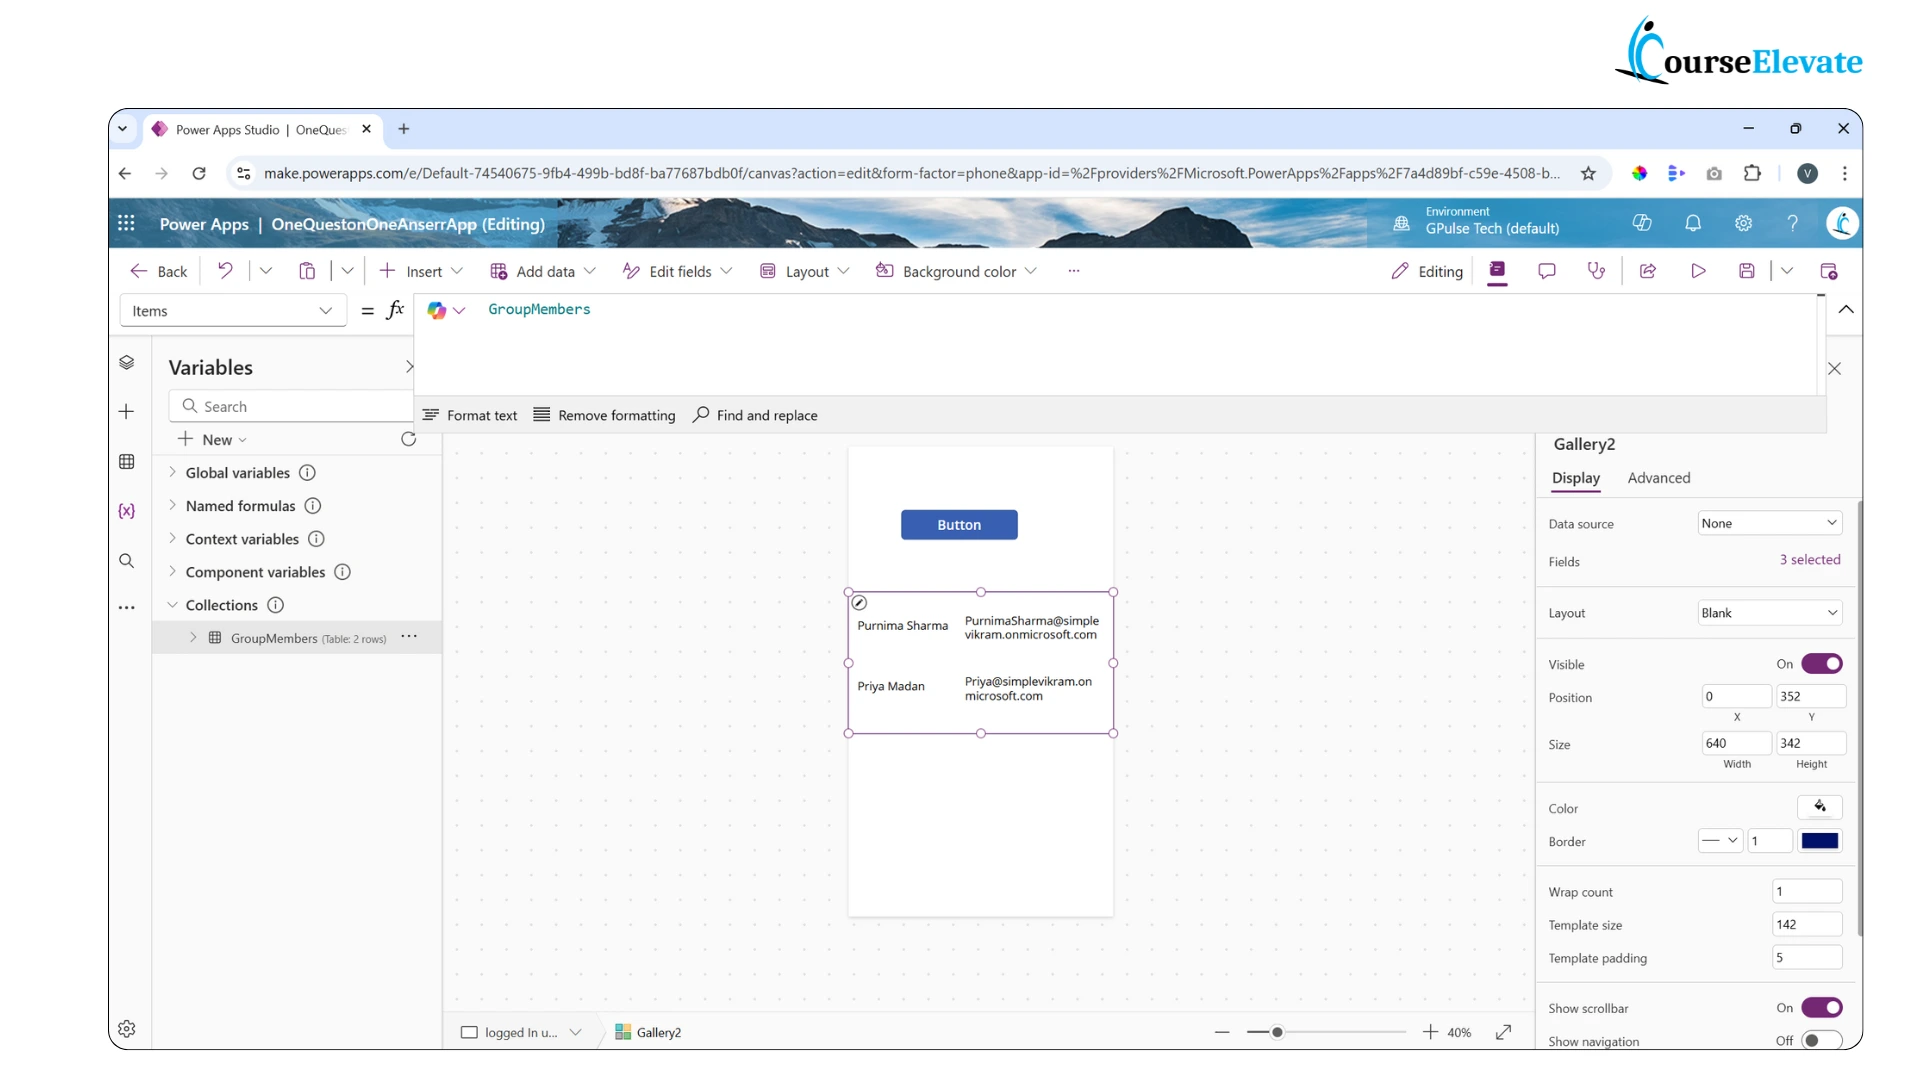
You can also set the item property of gallery to this collection to view the specified columns. In below image i have displayed 2 columns.
Step 4: Check If the Current User Is a Member
Compare the current user’s email with the group members.
If(
IsBlank(
LookUp(
GroupMembers,
userPrincipalName = User().Email
).mail
),
//User is not a member – apply fallback logic
"Not a Group Member",
// User is a member – apply role-based logic
"Group Member"
)
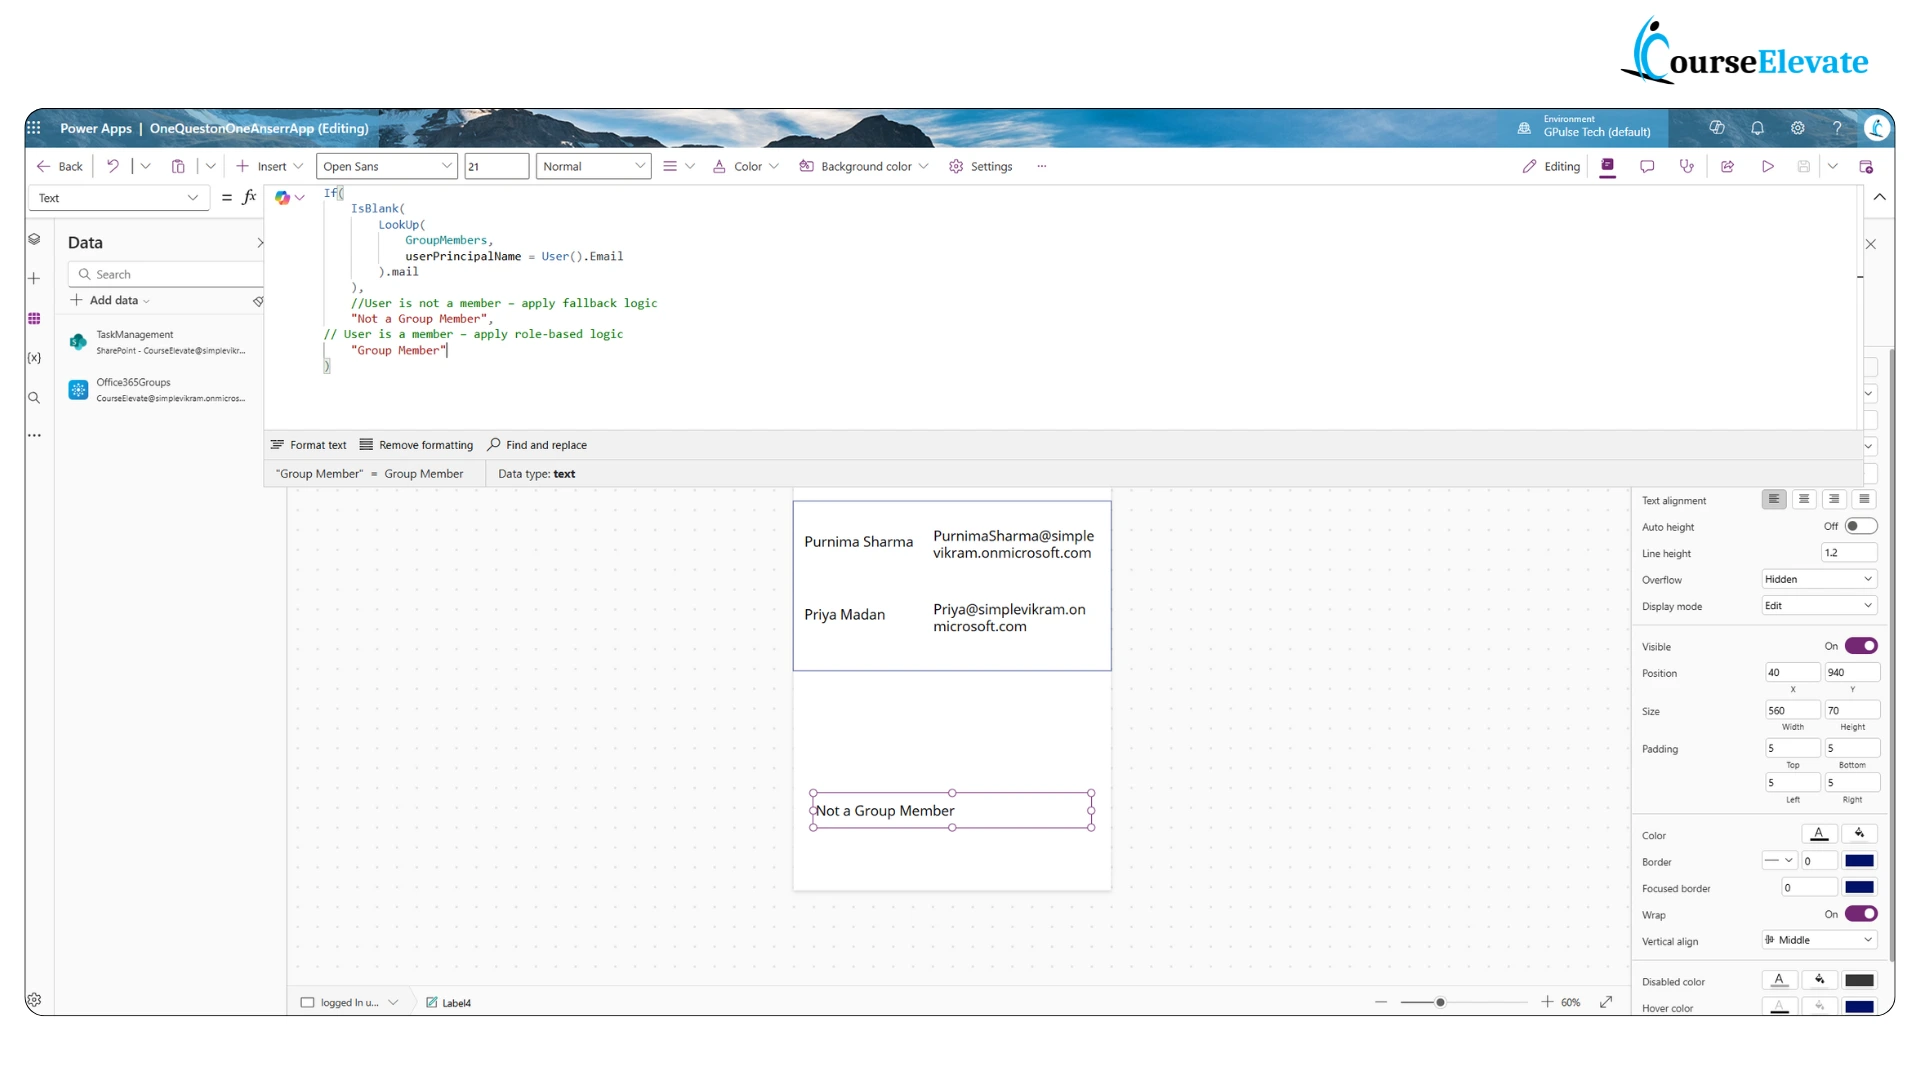
This logic uses LookUp() to find a match between the current user’s email and the UserPrincipalName in the group. If a match is found, the user is considered a member.
Step 5: Apply Role-Based Logic
Once membership is confirmed, you can:
- Show/hide controls based on role
- Enable/disable features for specific users
- Navigate to role-specific screens
Example : In a leave approval app, only users in the “HR Managers” group can see the “Approve” button.
Bonus Tips
- Use collections for performance optimization
- Combine with environment variables for dynamic configuration
- Use Power Automate for complex role checks or external data validation
Conclusion
Implementing role-based security in Power Apps using Azure AD groups ensures your app is secure, scalable, and user-aware. By leveraging the Office 365 Groups connector, you can dynamically control access and personalize user experiences.
Call to Action
Ready to secure your Power Apps? Try implementing Azure AD group-based access today and share your experience in the comments below!
for more power apps interview questions , visit this page.
Read microsoft documentation for Security role in Power apps
