

If you’re preparing for a Power Platform interview, one question is almost guaranteed to come up:
“How do you move an app from your development environment to test and then to production?”
There are three main ways to do this:
- Classic Export–Import
- Using Solutions
- Pipelines or DevOps for automated deployment
In this post, we’ll focus on the two fundamental methods — classic export–import and solution-based deployment — so you understand the basics. Pipelines and automated deployments are more advanced topics and will be covered in a future article.
Watch complete Youtube Video Here.
1. Classic Export–Import Method
The classic export–import approach is the simplest way to move a Power App between environments.
Best for:
- Solo developers
- Quick testing scenarios
- Simple apps not intended for production use
Why it’s not recommended for production:
This method doesn’t handle dependencies as smoothly as solutions and can become problematic in complex or team-based environments.
- Steps for Export–Import
Go to Your App - Navigate to the app you want to migrate.
- Click on the three-dot menu.
- Export the Package
- Select Export Package.
- Provide a package name (e.g., ManuTutorial_Tree).
- If the target environment doesn’t have the app, choose Create as new.
- If it already exists, select Update to replace it.
- Save the ZIP File
A .zip package will be generated and downloaded.
Import into Target Environment
In the target environment, choose Import Canvas App.
Upload the .zip file and complete the import.
Important:
If your app uses Power Automate flows, they will also be exported. However, you’ll need to manually re-map them if the same flows already exist in the target environment.
2. Solution-Based Deployment (Recommended Method)
The solution method is the best practice for moving apps between environments, especially in structured, team-based, and production scenarios.
Benefits of Using Solutions:
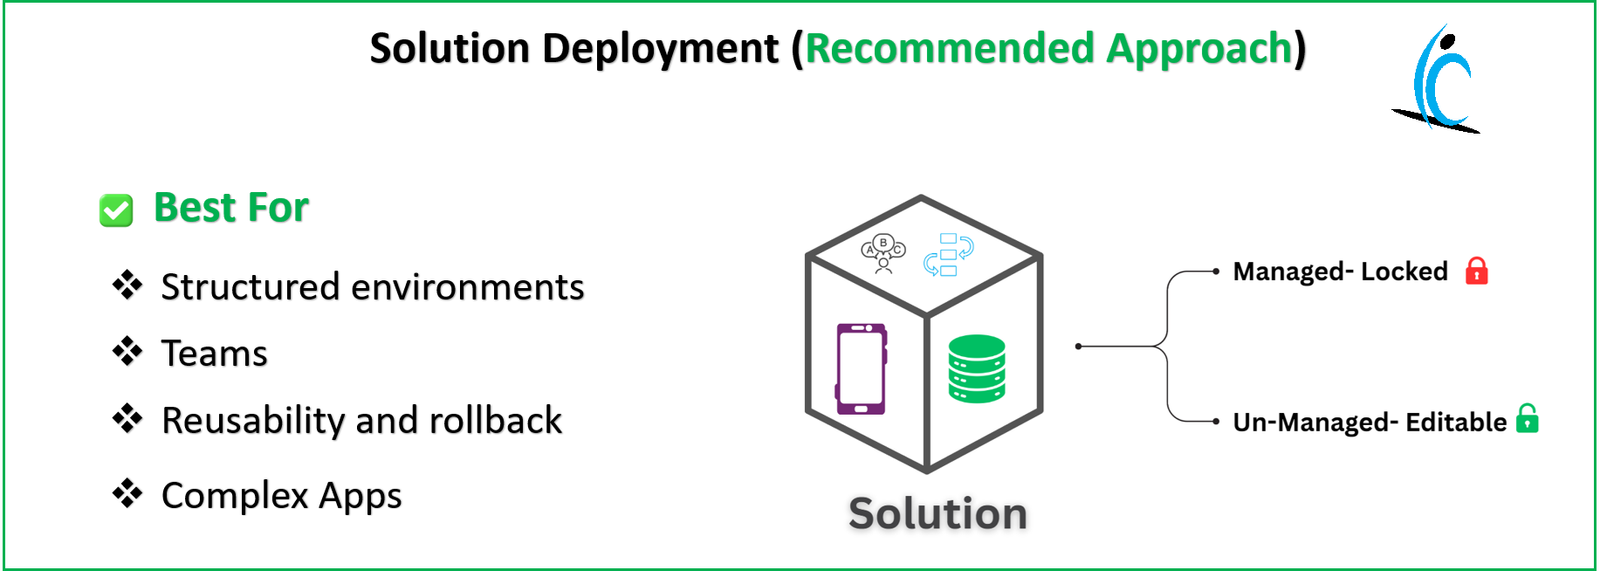
- Moves all dependencies (apps, flows, Dataverse tables, environment variables, etc.) together
- Supports rollback and version control
- Enables managed/unmanaged deployment flexibility
Steps for Solution Deployment
- Select Your Solution
- Navigate to Solutions in your current environment.
- Choose the solution you want to export (e.g., Finance Tracker).
- Export the Solution
- Click on the three-dot menu and choose Export Solution.
- Publish all changes before export to ensure updates are included.
- Choose Managed or Unmanaged
- Managed → For QA or Production (locked, not editable)
- Unmanaged → For Development (editable)
- Download the ZIP File
- The solution will be packaged and ready for download.
Import into Target Environment
- In the target environment, click Import Solution.
- Browse and upload the .zip file.
- Provide any necessary connection details (e.g., SQL connections).
- Once complete, you’ll see a success message confirming import.
Final Thoughts
If you’re working on simple prototypes or quick internal demos, the classic export–import method will do the job. But for production-ready, team-managed apps, solution-based deployment is the gold standard.
Stay tuned for the next article, where we’ll explore Pipelines and DevOps for automated deployments in Power Platform.
💡 Pro Tip: Always use managed solutions for production and QA environments to avoid accidental changes, and unmanaged solutions for development work.
